Showing posts with label CT TKO. Show all posts

Saturday, August 24, 2013

CT Extra Tags - Waiting For Love

When I purchased this gorgeous work of art by Anna Liwanag at CDO, I knew that Mrs.W.'s "Waiting For Love" would go perfectly.  It is available for purchase at TKO Scraps Store.

I have a few Extra Tags to share with you.  The "frame" you see in my tag is not in the kit - I made that using a PSP Shape that I found.  I've had it for years; don't know where I got it.

Usual terms apply when using my Extra Tags - they are for personal use and are not to be modified in any way.


Wednesday, August 14, 2013

Cluster Frame & Tags "Waiting For Love"

If you follow my Facebook Page, then you might have seen the "tease" that I would have something new soon.  From TKO Scraps, Mrs.W. has created "Waiting For Love" and it is so pretty.  Be sure to visit the store.

Here is the preview of the cluster - downloadable PNG version is below.  As always, frame is for personal use only; do not change File Name; do not share; send friends to my blog to download.


Cluster GemLC_25

Here are a few Extra Tags that I created with my cluster frame using the wonderful artwork of PinUpToons.  They are to be used as-is - you do not have permission to add names to them.


Wednesday, January 30, 2013

Tutorial Zebrush With Love PTU

Click on image to view full size.


There are no examples; users should have a working knowledge of PaintShopPro.

Supplies:
I am using PaintShop Pro XI
Filter - Xero Fritillary
Filter - Tramages - Tow The Line
Font of Choice

Tube of Choice - I used Zebrush which can not be used without a License.  You may purchase the tube at PicsForDesign.

"With Love" is a very special Collaboration.  The portion I used is KissedbyPix Designs; please visit her blog to learn more about the Collaboration and where you can get it.  >HERE<.

Template of Choice – I used 168 by Millie's PSP Madness.  Be sure to say thank you if you download.

~ Here We Go ~
Open Template; duplicate; close the original. Delete the designer's CR layer.
Some templates are large – you can resize later.

Copy and paste your Tube below Layer 10.  Resize as necessary; add Drop Shadow.

Layer 1 - Select All; Float; Defloat; then Selections; Modify; Expand by 1; Invert.  Copy and paste Paper 4 as a new layer; hit Delete; Select None.  Add Shadow.

Layer 3 - Select All; Float; Defloat; then Selections; Modify; Expand by 1; Invert.  Copy and paste Paper 4A as a new layer.  Resize 75%, then hit Delete; Select None.  Add Shadow.

Layer 4 - Open Button 5; Resize 70%; copy and paste as new layer; place the Button over the circle.  Add Shadow.

Layer 5 - Fill with a color of your choice.  I used #EEADDF.  Apply Xero Fritillary with settings:  Granularity 4, Aggression 30, Tesselation 32, Variation 36.  Add Shadow.

Layer 6 - Fill with a color of your choice.  I used #59337E.  Select All; Float; Defloat; Copy and paste Tube Close-up; resize as necessary; move to position you like.  Invert selection; Delete; Select None.  Change Blend Mode to Luminance or something that suits your tube.  Merge these two layers together then add Shadow.

Open Heart 5.  Copy and paste above Layer 7.  Resize 10%; Mirror; place where you like.  Add Shadow.

Layer 8 rectangle - I used Color #9375B1.  Then effects Tramage - Tow The Line with the following:
Control 0:  64
Control 1:  130
Control 2:  36
Control 3:  12
* My filter is in Filters Unlimited - your Controls might be different if using stand-alone of Tramage.

Open Paper 2; copy.  On Layer 9 Large Heart Select All; Float; Defloat.  Add New Layer, paste Paper 2 Into Selection.  Select None.  Add Shadow.

Layer 10 - Wordart.  I used a color from the Kit and added Noise.

Add as many other Elements to decorate your tag as you wish.

This is where I delete the white layer and then crop tag to visible layers.  Then I resize the tag; All Layers.

Now add your Credits.  Adding them after resizing your tag will ensure that they remain crisp; clear; and easy to read.

Add your Name and any Effects.  I used Black for my Name and EyeCandy Gradient Glow with a medium Pink.

I saved my tag in Transparent PNG Format.


Thank you for trying my tutorial.  Any ideas contained that are similar to others is purely coincidental.  Do not copy and claim as your own.  Group Owners may link to my tutorial.
LauraC
January 30, 2013


Sunday, January 20, 2013

Tut - Dickens Winter Embrace PTU

Click on image to view full size.

There are no examples; users should have a working knowledge of PaintShopPro.

Supplies:
I am using PaintShop Pro XI
EyeCandy 4000 Gradient Glow
Mura Meister Copies - Encircle

Tube of Choice - I used Archie Dickens which can not be used without a License.  I purchased my Tube from CILM.  You may purchase from CDO Store.

“Winter Embrace” is a PTU scrapkit created by KC’s Scrappin’ Sanctuary available from TKO Scraps in Tagger Size and Full Size.  Also be sure to check out her Blog.


~ Here We Go ~

Fill bottom layer with white; this will be deleted later.

Pick Preset Shape Tool / Ellipse / Width of 10 / No fill color.  I chose #a0c4ed as my line color.  Above your white layer, draw a large circle (hold Shift key while doing so will keep it circular).  Objects; Align; Center in Canvas, convert to Raster.

Using Magic Wand click inside the circle; then Selections; Modify; Expand by 3.  Add a new raster layer below the circle.  Open Paper11, copy and Paste into Selection.  Select none.

Add Noise to the circle frame layer - 80% / Uniform / Monochrome; then Sharpen.

Below the circle frame layer, copy and paste Flower 2.  I resized 25% then 80% and then colorized to Color #5480a6.  Now go to Mura Meister Copies, select Encircle.  I only changed the first 3 boxes – your numbers will be different, depending on the size of your large circle.  My flower ring is just barely outside of the frame (see tag).

>> My settings were:  first box 18, next one 75, next one 80 – leave the others to default.

Above the circle frame, copy and paste Frame 4.  I wanted to resemble a window so I resized 40%.

Below Frame 4, copy and paste Paper 9; Resize 70%.  Move into position; remove any excess showing outside the frame.

If you want to decorate ‘window’ the way that I did:

Copy and paste Winter Bird below frame layer; Resize 15%; Mirror.
Copy and paste Deer; Resize 70%.
Copy and paste Hot Cocoa 1; Resize 30%
Copy and paste Bow 2; Resize 30%; rotate left 90%.  Place at left.

Now go back and add Drop Shadow to all layers to your liking.

If you like, resize your tag; all layers.  Now add your Credits.  Adding them after resizing your tag will ensure that they remain crisp; clear; and easy to read.

Add your Name and any Effects.  I used White for my Name and EyeCandy Gradient Glow.  Then I added Drop Shadow.

Delete the white layer; crop to visible layers then save.  I saved mine in Transparent PNG Format.


Thank you for trying my tutorial.  Any ideas contained that are similar to others is purely coincidental.  Do not copy and claim as your own.  Group Owners may link to my tutorial.

LauraC
January 19, 2013.


Thursday, January 17, 2013

Tut - Mujica Primrose PTU

Click on image to view full size.


I wrote this tutorial (Mujica Primrose) on Jan. 17, 2013 from memory.  I do not recall all of the settings I used.  There are no examples; users should have a working knowledge of PaintShopPro.


Supplies:

PaintShop Pro XI
EyeCandy 4000 Gradient Glow

Tube of Choice - I used the wonderful artwork of Alicia Mujica which can not be used without a License from her Blog >HERE<.

"Primrose Evermore" is a PTU scrapkit created by KissedbyPix Designs, available in Full Size and Tagger Size at TKO Scraps.  Visit her blog >HERE<.

Template of Choice - I used Deb/Creative by Nature Template CBN_MusicTemp2 (I saved in 2011 from Misfits blog) >HERE<  I do not know if it is still available; be sure to say Thank You if it is.

Mask of Choice - I used Scrap It Studio SIS_MASK16 which you will find >HERE<.  Be sure to say Thank You if you download.

~ Here We Go ~

Open Template; duplicate; close the original.
Delete the designer's CR layer.
Delete Layer 1 - contains wordart.
The template is 700x700; I resized mine 86%.

Activate Layer 8.  Select All; Float; Defloat. Then Selections; Modify; Expand by 1.

Open Paper KBP_PE_Bohken6; resize 80%; Copy then Paste as a New Layer.  Position paper where you like then Selections; Invert; press Delete.

Select None.  Add Drop Shadow of your choice.

Delete template layer.

Activate Layer 7.  Select All; Float; Defloat. Then Selections; Modify; Expand by 1.

Open Paper KBP_PE_Bohken4; resize 80%; Copy then Paste as a New Layer.  Position paper where you like then Selections; Invert; press Delete.

Select None.  Add Drop Shadow of your choice.

Delete template layer.

I used the same Paper on Layer 6.  I just moved the paper around to where a different 'design' showed.

Activate Layer 5 - use the SAME Selection instructions as before.

Open Paper KBP_PE_Dreamy; resize 80%; Copy then Paste as a New Layer.  Position the paper where you like then Selections; Invert; press Delete.

Select None.  Adjust / Add Remove Noise with these settings:
Uniform / 40% / Monochrome

Add Drop Shadow of your choice.

Delete template layer.

Activate Layer 4 - use the SAME Selection instructions as before.

Open Paper KBP_PE_Velvet3; do not resize. Copy then Paste as a New Layer.  Position the paper then Selections; Invert; press Delete.

Select None.  Copy and paste Element KBP_PE_Swirly5 above the paper; position where you like.  Duplicate then position towards the bottom.  Copy and paste KBP_PE_Swirly3 and place in the middle.  (see my tag for example).

Hide all layers; unhide the THREE SWIRLS and Merge Visible.  Add Drop Shadow of choice.

Unhide the paper.  On the SWIRLS layer, erase any that sticks out beyond the paper.  Merge visible the Swirls and the large paper circle.

Add Drop Shadow of your choice to the merged layer.

Delete template layer.

Unhide all layers.  Go to Layer 3 - Fill this layer with a color of your choice.

Layer 2 - Leave white or select with Magic Wand and fill with a contrasting color of your choice.  Deselect.

With Magic Wand, click INSIDE Layer 2.  Selections; Modify; Expand by 3.

Open your Tube; copy and paste BELOW Layer 2.  Position to your liking.  Now Selections; Invert; press Delete.  Select none.

Change Blend Mode to Luminance Legacy.

Back to Layer 2 - add a small Drop Shadow to the small circle frame.

Hide All Layers then unhide Layer 2, Layer 3 and Tube; Merge Visible.  Add Drop Shadow to this merged layer.

Unhide all layers.

Open your Tube; copy and paste above all other layers.  Resize to your liking; position where you like.  Add Drop Shadow.

Add a New Layer for your Mask.  I chose two soft colors; fading background gradient; filled layer.  Then I added a bit of Noise:
Random / 20% / Monochrome

Move this layer to the bottom.

Open your Mask; go back to your Tag.  On the layer you just filled, Layers; New Mask Layer; From Image; locate Mask's Name; Invert mask NOT checked; press OK.

In your layer pallet, right-click on the Mask Layer (the black and white image); select Delete; click YES.  Now right-click on one of the mask color layers; select Merge; Merge-Group.

Add other Elements from the Kit to decorate your tag the way you like.  I used the following items:
KBP_PE_fetti
KBP_PE_Heart1
KBP_PE_Rose3
KBP_PE_Rose5

Add your Name and any Effects.  I used an orange-ish shade for my Name and a dark purple shade with EyeCandy Gradient Glow.  Then I added a soft Drop Shadow.

If you like, resize your tag; all layers.

Now add your Credits.

Save your tag.  I saved mine in Transparent PNG Format.

Thank you for trying my tutorial.  Any ideas contained that are similar to others is purely coincidental.  Do not copy and claim as your own.  Group Owners may link to my tutorial.
LauraC
January 17, 2013

Monday, December 10, 2012

Exclusive (Lady Mishka)

If you are the type that doesn't like all the bright and sometimes glitzy colors of Christmas, then you should check out "Tiny Gothic Xmas" by KissedbyPix Designs.  This is a tag I made with the kit and a wonderful Exclusive that I purchased at PFD.  Another reason I selected this tube is because she looks a little sad to me and not everyone is cheery during the Holidays; going through rough times and other challenges. 

Thursday, November 8, 2012

Iced Mocha - KissedbyPix

Oh my friend "Pixie" has something new and wonderful for winter tagging.  It's called "Iced Mocha" - it is so cute.  Here is what I made; everything you see is in the kit, and much more.  Now pop on over to her blog so you can get one for yourself. :) 

Sunday, April 15, 2012

A Bit of Catching Up

I have been remiss with adding tags to my Blog ... I am doing most of that via Facebook.  Being someone who is "no spring chicken", I do have vision issues and slight problems with my hands.  At the very least, I should upload any CT tags that I have made.

The Easter holiday has passed but this "Puddles n Pansies" kit from KissedbyPix Designs is full of beautiful Springtime colors.  It is available in both Fullsize and Tagger Size.  I really enjoyed playing with this kit and I added one of my favorite artists, PinUpToons.


Saturday, March 3, 2012

Spring ... Ambrosia Dream

KissedByPix Designs has a lovely kit "Ambrosia Dream" that was released a little bit ago, available at TKO Scraps Store.  Now that the sunshine is beginning to appear, I finally had an idea for her kit.  The artwork is an Exclusive at PFD.  Click to view original size. 
Sunday, February 26, 2012

"Shamrock Showers" - Two Versions

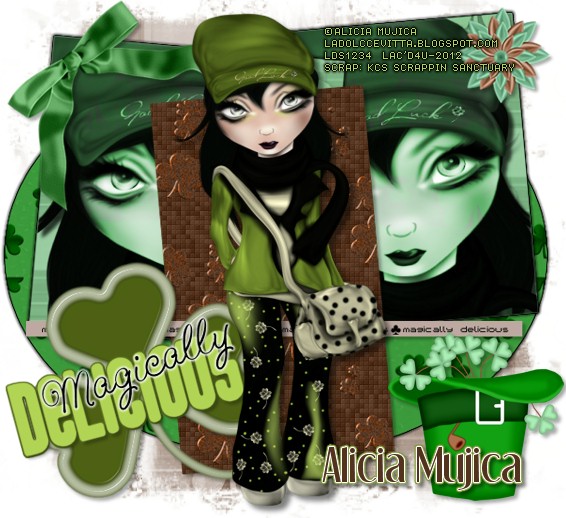
KC's Scrappin Sanctuary has created a darling St. Patrick's Day kit called "Shamrock Showers" and you can get it at TKO Scraps Store.  I enjoyed it so much that I made two tags - one with Alicia Mujica and one with Scott Blair.  Click to view original size. 

Saturday, January 14, 2012

Alicia Mujica

KissedByPix Designs has a lovely new kit called "Rions Heart".  You can purchase it at TKO Scraps Store in either Full Size or Tagger Size.  I chose the artwork of Alicia Mujica (PTE) for my tag.  Click to view original size.   

Sunday, December 11, 2011

Doggie Snowglobe Musicbox

KissedByPix Designs' "Comfort & Joy" kit has so many wonderful items to play with, I just *had* to make another tag.  :)  My favorite 4-legged domesticated animals are Dogs, so I used this cutie by Marco Guaglione.  No tutorial used.  Click to view original size. 

Tuesday, December 6, 2011

Comfort & Joy PTU

If you are looking for an elegant and fun kit, then check out "Comfort and Joy" from Kissed By Pix Designs.  There are many more gorgeous Papers and Elements than what are shown in my tag.  It can be purchased at TKO Scraps (Full Size & Tagger Size). 

The tube I used was purchased from CILM which is closed.  I used a few parts of a template by KandiKissezTagz.  Click to view original size.

Saturday, November 26, 2011

New CT Tag

I would like to show you my "Jumpin' Java" Cafe with the artwork of Zlata enjoying a cuppa.  You can buy this really neat kit by Kcs Scrappin Sanctuary at TKO Scraps.  Click to view original size. 

Sunday, November 20, 2011

New Years tag for KBP

I have a new Kissed By Pix Designs tag to show you.  The kit I used is called Pewter Dreams and can be purchased at TKO Scraps.  If you are looking for an elegant kit for your New Years tags, you should check it out.

The tube I used was purchased from CILM which is closed.  I used a template by Tamie.  Click to view original size. 

Sunday, October 30, 2011

My First CT Tag

I am so very pleased to show you my very first tag for Kissed By Pix Designs.  She has made a gorgeous kit called Mon Beau Jardin which you can purchase at TKO Scraps.  I love the colors and I chose this tube by Elias Chatzoudis to go with it.  Click to view original size.