Pick up the bright and cheery "Spring Wishes" by Honored Scraps and you'll be all set for Spring-themed creating. The kit is available >HERE<
I have two Extra Sets for you today - one with the artwork of Alicia Mujica and another with Cuddly Rigor Mortis. You'll find a set in both JPG and PNG formats in the Zip File. Extras are not to be altered in any way. Please do not share the download link; send friends to my Blog.
Thank you for visiting. :-) Though comments for downloading are not required, they are very much appreciated. Please feel free to comment here or use the Chat Box.
>Set 92847_Mujica< / >Set 92848_CuddlyRM<
Showing posts with label Mujica. Show all posts
Sunday, April 12, 2015
Tuesday, November 5, 2013
Cluster Frame 2 - Gobble Gobble
I have a second Cluster Frame for you made with Kaci's wonderful kit, "Gobble Gobble". Please be sure to visit her blog for information where you can purchase the kit.
Here is the preview of the cluster - downloadable PNG version is below. As always, frame is for personal use only; do not change File Name; do not share; send friends to my blog to download.
Cluster_GemLC_31
Here is a tag I made with my cluster using the adorable artwork of Alicia Mujica. I added a few more elements and papers from the kit in creating my tag.
Here is the preview of the cluster - downloadable PNG version is below. As always, frame is for personal use only; do not change File Name; do not share; send friends to my blog to download.
Cluster_GemLC_31
Saturday, March 2, 2013
Tutorial Blue Monday Mujica FTU
Supplies:
- I am using PaintShop Pro XI
- Eye Candy 4000 - Gradient Glow
- Tube of Choice - I used the artwork of Alicia Mujica, which can
not be used without a License. You may purchase the tube from her
Store.
- Kit of Choice - I used "Blue Monday" by Gimptastic Scraps (previously PTU). Please visit Blog and be sure to say thank you if you download.
- Font of choice - I used Alba (came with WinXP)
~ Here We Go ~
New raster image 650x650 (room to work); fill bottom layer with white.
Preset Shape Tool - Rectangle
Foreground - Color #6c3723 (or one to match your tube)
Background - Paper 3
Hold Shift Key; drag to draw large square.
Position where you like; then right-click layer; convert to Raster.
With Magic Wand, click the color outline of the square.
Selections; Modify; Expand by 1
Selections; Float - Fill with same color
Keep selected; add Drop Shadow: 2 / 2 / 50 / 3
Deselect
Preset Shape Tool - Rectangle; line width 10
Foreground - Color #175062 (or one to match your tube)
Background - Paper 4
Hold Shift Key; drag to draw small square.
Convert to Raster; place to left side. Duplicate.
On original rotate Left 15 Degrees.
On duplicate; Mirror; then rotate Right 15 Degrees.
With Magic Wand, click the color outline of small square.
Selections; Modify; Expand by 1
Selections; Float - Fill with same color
Keep selected; add Drop Shadow: 2 / 2 / 50 / 3
Deselect
Repeat for second small square.
Copy and paste your Tube. Add Drop Shadow of your choosing.
Copy and paste Cluster 1 below your tube. Add Drop Shadow of your choosing.
Copy and paste Cluster 2. Add Drop Shadow of your choosing.
Continue to decorate your tag with whatever elements suit your design. I used: Globe, Flower 4, Binoculars, Bottle
If you like, resize your tag; all layers. Now add your Credits.
Adding them after resizing your tag will ensure that they remain crisp;
clear; and easy to read.
Add your Name and any Effects. I used Alba for my Name and EyeCandy Gradient Glow.
Delete the white layer; crop to visible layers then save. I saved mine in Transparent PNG Format.
LauraC
March 2, 2013
Thursday, January 17, 2013
Tut - Mujica Primrose PTU
Click on image to view full size.
Thank you for trying my tutorial. Any ideas contained that
are similar to others is purely coincidental. Do not copy and claim as
your own. Group Owners may link to my tutorial.
LauraC
January 17, 2013
I wrote this tutorial (Mujica Primrose) on Jan. 17, 2013 from
memory. I do not recall all of the settings I used. There are no
examples; users should have a working knowledge of PaintShopPro.
Supplies:
PaintShop Pro XI
EyeCandy 4000 Gradient Glow
Tube of Choice - I used the wonderful artwork of Alicia Mujica which can not be used without a License from her Blog >HERE<.
"Primrose Evermore" is a PTU scrapkit created by KissedbyPix Designs, available in Full Size and Tagger Size at TKO Scraps. Visit her blog >HERE<.
Template of Choice - I used Deb/Creative by Nature Template CBN_MusicTemp2 (I saved in 2011 from Misfits blog) >HERE< I do not know if it is still available; be sure to say Thank You if it is.
Mask of Choice - I used Scrap It Studio SIS_MASK16 which you will find >HERE<. Be sure to say Thank You if you download.
~ Here We Go ~
Open Template; duplicate; close the original.
Delete the designer's CR layer.
Delete Layer 1 - contains wordart.
The template is 700x700; I resized mine 86%.
Activate Layer 8. Select All; Float; Defloat. Then Selections; Modify; Expand by 1.
Open Paper KBP_PE_Bohken6; resize 80%; Copy then Paste as a New
Layer. Position paper where you like then Selections; Invert; press
Delete.
Select None. Add Drop Shadow of your choice.
Delete template layer.
Activate Layer 7. Select All; Float; Defloat. Then Selections; Modify; Expand by 1.
Open Paper KBP_PE_Bohken4; resize 80%; Copy then Paste as a New
Layer. Position paper where you like then Selections; Invert; press
Delete.
Select None. Add Drop Shadow of your choice.
Delete template layer.
I used the same Paper on Layer 6. I just moved the paper around to where a different 'design' showed.
Activate Layer 5 - use the SAME Selection instructions as before.
Open Paper KBP_PE_Dreamy; resize 80%; Copy then Paste as a New
Layer. Position the paper where you like then Selections; Invert; press
Delete.
Select None. Adjust / Add Remove Noise with these settings:
Uniform / 40% / Monochrome
Add Drop Shadow of your choice.
Delete template layer.
Activate Layer 4 - use the SAME Selection instructions as before.
Open Paper KBP_PE_Velvet3; do not resize. Copy then Paste as a New
Layer. Position the paper then Selections; Invert; press Delete.
Select None. Copy and paste Element KBP_PE_Swirly5 above the
paper; position where you like. Duplicate then position towards the
bottom. Copy and paste KBP_PE_Swirly3 and place in the middle. (see my
tag for example).
Hide all layers; unhide the THREE SWIRLS and Merge Visible. Add Drop Shadow of choice.
Unhide the paper. On the SWIRLS layer, erase any that sticks out
beyond the paper. Merge visible the Swirls and the large paper circle.
Add Drop Shadow of your choice to the merged layer.
Delete template layer.
Unhide all layers. Go to Layer 3 - Fill this layer with a color of your choice.
Layer 2 - Leave white or select with Magic Wand and fill with a contrasting color of your choice. Deselect.
With Magic Wand, click INSIDE Layer 2. Selections; Modify; Expand by 3.
Open your Tube; copy and paste BELOW Layer 2. Position to your liking. Now Selections; Invert; press Delete. Select none.
Change Blend Mode to Luminance Legacy.
Back to Layer 2 - add a small Drop Shadow to the small circle frame.
Hide All Layers then unhide Layer 2, Layer 3 and Tube; Merge Visible. Add Drop Shadow to this merged layer.
Unhide all layers.
Open your Tube; copy and paste above all other layers. Resize to your liking; position where you like. Add Drop Shadow.
Add a New Layer for your Mask. I chose two soft colors; fading background gradient; filled layer. Then I added a bit of Noise:
Random / 20% / Monochrome
Move this layer to the bottom.
Open your Mask; go back to your Tag. On the layer you just filled,
Layers; New Mask Layer; From Image; locate Mask's Name; Invert mask NOT
checked; press OK.
In your layer pallet, right-click on the Mask Layer (the black and
white image); select Delete; click YES. Now right-click on one of the
mask color layers; select Merge; Merge-Group.
Add other Elements from the Kit to decorate your tag the way you like. I used the following items:
KBP_PE_fetti
KBP_PE_Heart1
KBP_PE_Rose3
KBP_PE_Rose5
Add your Name and any Effects. I used an orange-ish shade for my
Name and a dark purple shade with EyeCandy Gradient Glow. Then I added a
soft Drop Shadow.
If you like, resize your tag; all layers.
Now add your Credits.
Save your tag. I saved mine in Transparent PNG Format.
LauraC
January 17, 2013
Tuesday, June 12, 2012
"Better Rich" Results
When I saw Tradgedy's tutorial, I immediately thought of this wonderful image by Alicia Mujica. Then I went searching through the coffee and/or chocolate themed kits and I chose a PTU by Sam's Scraps. During a PSP event I received a gift certificate as a door prize, and this was one of the items I chose; "Mocha Lime Latte".
Sunday, February 26, 2012
"Shamrock Showers" - Two Versions
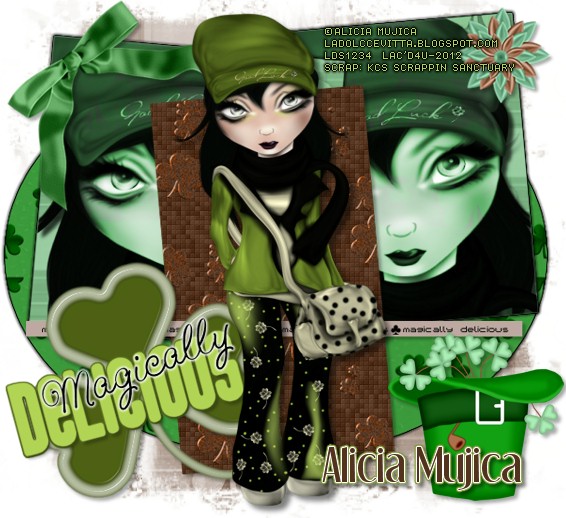
KC's Scrappin Sanctuary has created a darling St. Patrick's Day kit called "Shamrock Showers" and you can get it at TKO Scraps Store. I enjoyed it so much that I made two tags - one with Alicia Mujica and one with Scott Blair. Click to view original size.
Shower The People You Love...
I really love Alicia Mujica's unique artwork and when I saw this one, I had to have it. I used a kit from Teresa's Scraps "Last Days of Summer" that I have had for quite awhile. Click to view original size.
Saturday, January 14, 2012
Alicia Mujica
KissedByPix Designs has a lovely new kit called "Rions Heart". You can purchase it at TKO Scraps Store in either Full Size or Tagger Size. I chose the artwork of Alicia Mujica (PTE) for my tag. Click to view original size.
Thursday, November 24, 2011
Winter - Alicia Mujica
While our Thanksgiving dinner is being warmed up, I made a new tag. This adorable piece is by Alicia Mujica. I used a kit from 2010 blogtrain. Click to view original size.
Thursday, November 10, 2011
Happy Thanksgiving
Alicia Mujica is a new artist for me - made my first purchase this week when I saw an Elf she did. Then I saw this one for Thanksgiving - just too cute to pass up. No tutorial was used to make tag; kit is from a 2010 blog train. Click to view original size.
Subscribe to:
Posts (Atom)